
5-Ingredient Air Fryer Breaded Zucchini Sticks
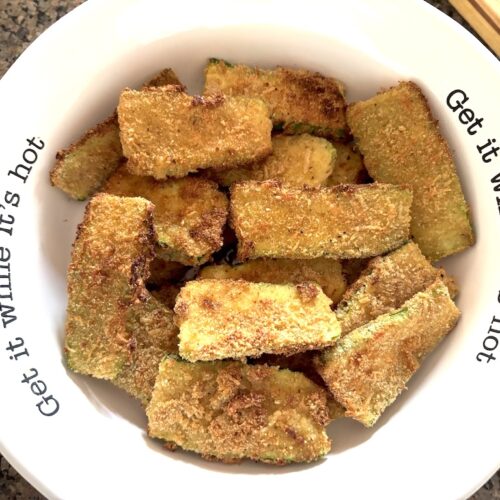
These 5-ingredient air fryer breaded zucchini sticks are a quick, crispy veggie snack that even kids and picky eaters are going to love! They’re perfect as a side dish for weeknight dinners, a party appetizer, or as an after-school snack.

⏰ TIME: 30 mins | 🤑 COST: $6.00
🥦 5 INGREDIENTS
This recipe was inspired by the deliciousness of the hand-breaded zucchini at Eat n’ Park – a local diner that’s uber famous here in Pittsburgh!
While the original zucchini sticks are deep-fried, this version is air-fried for a healthier snack that’s still crispy, crunchy, and cheesy!
They’re a quick and easy snack, appetizer, or side dish made with just 5 simple ingredients. The best part is that they’re ready in just 20 minutes – perfect for when you need a healthy snack in a pinch.
🥒 Looking for easy recipes to use up your leftover zucchini? Here are 20 zucchini recipes made with 5 ingredients or less!
Whether you’re trying to get in more veggies or looking for a healthier alternative to French fries, this recipe is a total win. No deep frying or oily, greasy zucchini sticks here!
🍎 More Kid-Friendly Snacks
- After School Snack Recipes
- Baked Cheese Crisps
- High-Protein Smoothie Recipes
- Yogurt Popsicle Recipes
- 101 Snack Ideas (+FREE Printable)

Need snack ideas? 🍿
Sign up for my email list & I’ll send you a FREE printable PDF with 101 snack ideas! As a bonus for signing up, you’ll also get a brand new meal plan with 5-ingredient recipes sent to your inbox each month! 💖
Why You’ll Love This Recipe
There are so many different reasons to love these breaded zucchini sticks!
🥒 These breaded zucchini sticks are:
- Air-fried, not deep-fried
- Healthier alternative to french fries
- Crispy and crunchy
- Made with just 5 ingredients
- Ready in under 15 minutes
- Picky-eater approved
- Pairs well with a lot of dishes
Serving Suggestions
- Serve as an kid-friendly snack with marinara or ranch
- Side dish for dinner next to pasta, grilled chicken, breaded chicken, salmon, or meatballs
- Bring these as a game day appetizer (or any party app!)
- Serve next to burgers as a healthier alternative for French fries
Ingredients & Substitutions


- Zucchini – the star of the show in this recipe! Try to use zucchinis that are firm and bright green in color
- Breadcrumbs – these add some crunch and texture to the zucchini sticks! You can use regular or whole wheat breadcrumbs. You could also use Panko breadcrumbs if that’s what you have in the pantry.
- Parmesan cheese – adds a yummy, salty, and cheesy flavor to the zucchini sticks. I recommend skipping this ingredient if you’re making these for babies
- Eggs – necessary for making the breadcrumb mixture stick to the zucchini sticks. If you are allergic to eggs or need an alternative, you could use buttermilk + flour, melted butter, or oil.
- Garlic powder – adds a little bit of extra flavor to the zucchini sticks. You could skip this ingredient or try onion powder instead if you wish!
Equipment You’ll Need

The following text may contain Amazon affiliate links. As an Amazon Associate, I earn a small commission from qualifying purchases made through links on this post at no additional cost to you.
- Air fryer – if you don’t have an air fryer, you can just bake these in your oven instead (425℉ for about 20 minutes). I got a Ninja air fryer last year and it’s been incredible, so I highly recommend that one if you’re in the market for an air fryer!
- Parchment Liners for air fryer (optional) – this is totally optional, but something I highly recommend if you use your air fryer frequently. These liners pair very well with the Ninja air fryer. It’s so easy to get the food in/out of the air fryer, the basket is easier to clean up without stuck food bits, and it still crisps up the food perfectly without any compromise in texture!
- Shallow mixing bowls – you will need two shallow bowls – one for the egg and one for the breadcrumb mixture. I like using pasta bowls for this, but you can also just use a larger mixing bowl if you wish!
- Tongs – not required, but really comes in handy for turning the zucchini sticks in the air fryer.
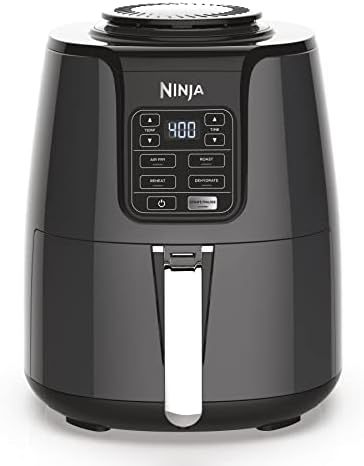

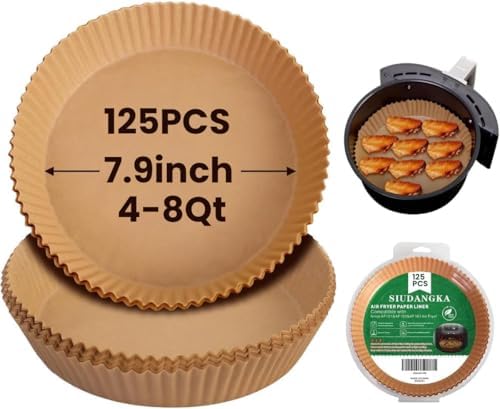
The product links above are affiliate links. As an Amazon Associate, I earn a small commission from qualifying purchases made through these links at no additional cost to you.
How to Make the Breaded Zucchini Sticks


Storage Instructions
Fridge: Store leftover zucchini sticks in an airtight container in the fridge for up to 2 days. Reheat in the air fryer at 375°F for 3–4 minutes to re-crisp.
Freezing: Unfortunately, these zucchini sticks do not do well in the freezer. Zucchini has a high water content and can get soggy when frozen and thawed. Soggy breadcrumb mixture is not very tasty!
The Printable Recipe Card
5-Ingredient Air Fryer Breaded Zucchini Sticks
Equipment
- Air Fryer
- 2 Shallow bowls
- Parchment liners for air fryer (optional)
- Tongs (optional)
Ingredients
- 4 medium zucchini
- 1 cup breadcrumbs regular, whole-wheat, or panko
- 1/2 cup grated or shredded parmesan cheese
- 2 large eggs
- 1/2 tsp garlic powder
Pantry staples
- Salt and pepper (to taste)
- Olive oil spray (optional)
Instructions
- Prep the zucchini: Wash the zucchini first. Cut both ends and discard. Slice each zucchini into sticks (see picture)

- Set up the coating stations: In a shallow bowl, beat the eggs. In a second shallow bowl, combine the breadcrumbs, Parmesan cheese, garlic powder, salt, and pepper. I used about 1/2 teaspoon of salt and pepper each but you can use more or less depending on your preference.
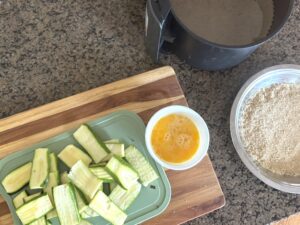
- Bread the zucchini: Dip each zucchini stick in the egg. Then, press each egg-coated zucchini stick into the breadcrumb mixture until it is completely coated. Press gently so that the mixture sticks. Place each breaded zucchini stick into the air fryer basket.
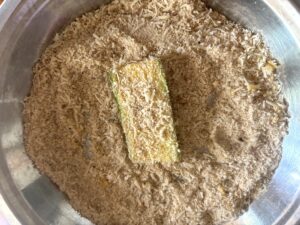
- Place in air fryer basket: Arrange zucchini in a single layer inside the air fry basket. Be careful not to overcrowd the basket. Spray the tops of the zucchini sticks lightly using olive oil spray (optional). This will give the zucchini sticks a golden crust.
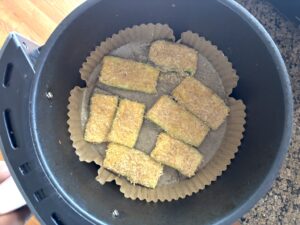
- Air fry at 400°F for 10 minutes, flipping halfway through. Check on them periodically to make sure they don't overcook. Remove the zucchini sticks once they are golden and crisp.
- Serve and enjoy! Pair it with marinara sauce or ranch dressing, which both serve as great dips for these zucchini sticks!

Notes
- Make it gluten-free: Use gluten-free panko or crushed cornflakes.
- Make it dairy-free: Skip the Parmesan or sub with dairy-free cheese or nutritional yeast.
- Make it egg-free: You could use buttermilk + flour, melted butter, or oil to coat the zucchini sticks.
- Cut the zucchini evenly and into thin strips for even cooking. The thicker the slices are, the longer it will take and they may not cook evenly.
- Don’t overcrowd the basket to make sure the zucchini sticks crisp up and cook evenly. It’s best to work in batches. I had to make 3 batches for this recipe.
- Experiment with different seasoning! Don’t be afraid to jazz it up with Italian seasoning, try onion powder, add a little bit of paprika, or even lemon zest to change up the flavor.
- Pair it with a dip such as marinara, honey mustard, or ranch. Toddlers love to dip things, so they’re gonna love these zucchini sticks next to a cup of their favorite dip!
☀️5-Ingredient Summer Recipe Roundups
- Cucumber Lunch Recipes
- High-Protein Smoothie Recipes
- No-Bake Desserts
- Peach Recipes
- Picnic Food Recipes
- Summer Dinner Recipes
- Yogurt Popsicle Recipes
- Zucchini Recipes
🍊More 5-Ingredient Summer Recipes!
- Air Fryer Breaded Zucchini Sticks
- Chicken Caesar Salad Wraps
- Chicken Sausage and Zucchini Pasta
- Creamy Greek Yogurt Pesto Pasta
- Peanut Butter Strawberry Banana Smoothie
- Summer Squash Feta Pasta Bake
